
树莓派架设私有网盘--NextCloud
安装
1. 依赖库
sudo apt install apache2
sudo apt install phpmyadmin php7.0-xml php7.0-curl php7.0-mcrypt
sudo apt install marriadb-server
sudo service apache2 restart
sudo service marriadb restart
2. 下载NextCloud软件包
wget https://download.nextcloud.com/server/releases/nextcloud-17.0.0.zip
3. 安装到web目录
unzip nextcloud-17.0.0.zip
sudo mv nextcloud /var/www/
配置
1. 创建数据目录
sudo cd /var/www/nextcloud
sudo mkdir data
2. 修改权限
cd ../
sudo chown -R www-data:www-data nextcloud
3. 添加访问域名
修改/var/www/nextcloud/config/config.php文件,将你会访问nextcloud所采用的网址都输入到这里. 按以下格式参考.
'trusted_domains' =>
  array (
    0 => '192.168.1.112',
    1 => 'www.yourdomain.com',
 ),
4. 修改php上传限制
$ sudo vi /etc/php/7.0/apache2/php.ini

post_max_size = 100M
upload_max_filesize = 1024M
5. 修改apache配置文件
sudo vim /etc/apache2/sites-available/000-default.conf

<VirtualHost *:80>
        # The ServerName directive sets the request scheme, hostname and port that
        # the server uses to identify itself. This is used when creating
        # redirection URLs. In the context of virtual hosts, the ServerName
        # specifies what hostname must appear in the request's Host: header to
        # match this virtual host. For the default virtual host (this file) this
        # value is not decisive as it is used as a last resort host regardless.
        # However, you must set it for any further virtual host explicitly.
        #ServerName www.example.com

        ServerAdmin webmaster@localhost
        # 修改程序路径根路径
        DocumentRoot /var/www/nextcloud

        # Available loglevels: trace8, ..., trace1, debug, info, notice, warn,
        # error, crit, alert, emerg.
        # It is also possible to configure the loglevel for particular
        # modules, e.g.
        #LogLevel info ssl:warn

        ErrorLog ${APACHE_LOG_DIR}/error.log
        CustomLog ${APACHE_LOG_DIR}/access.log combined

        # For most configuration files from conf-available/, which are
        # enabled or disabled at a global level, it is possible to
        # include a line for only one particular virtual host. For example the
        # following line enables the CGI configuration for this host only
        # after it has been globally disabled with "a2disconf".
        #Include conf-available/serve-cgi-bin.conf
</VirtualHost>
6. 重启apache
sudo systemctl restart apache2

#然后就可以通过web访问了,但是还不能使用
7. 配置mysql
a. mysqladmin -u root -p password YOUR_PASSWORD_HERE, 设置root密码.
b. mysql -uroot -p 用root登入
c. 登入成功后, 创建数据库: create database nextcloud;
d. 创建用户, create user 'nextclouduser'@'localhost' identified by 'YOUR_PASSWORD_HERE';
e. 授权. grant all privileges on nextcloud.* to 'nextclouduser'@'localhost' identified by 'YOUR_PASSWORD_HERE';
f. exit退出即可
8. 登录nextcloud
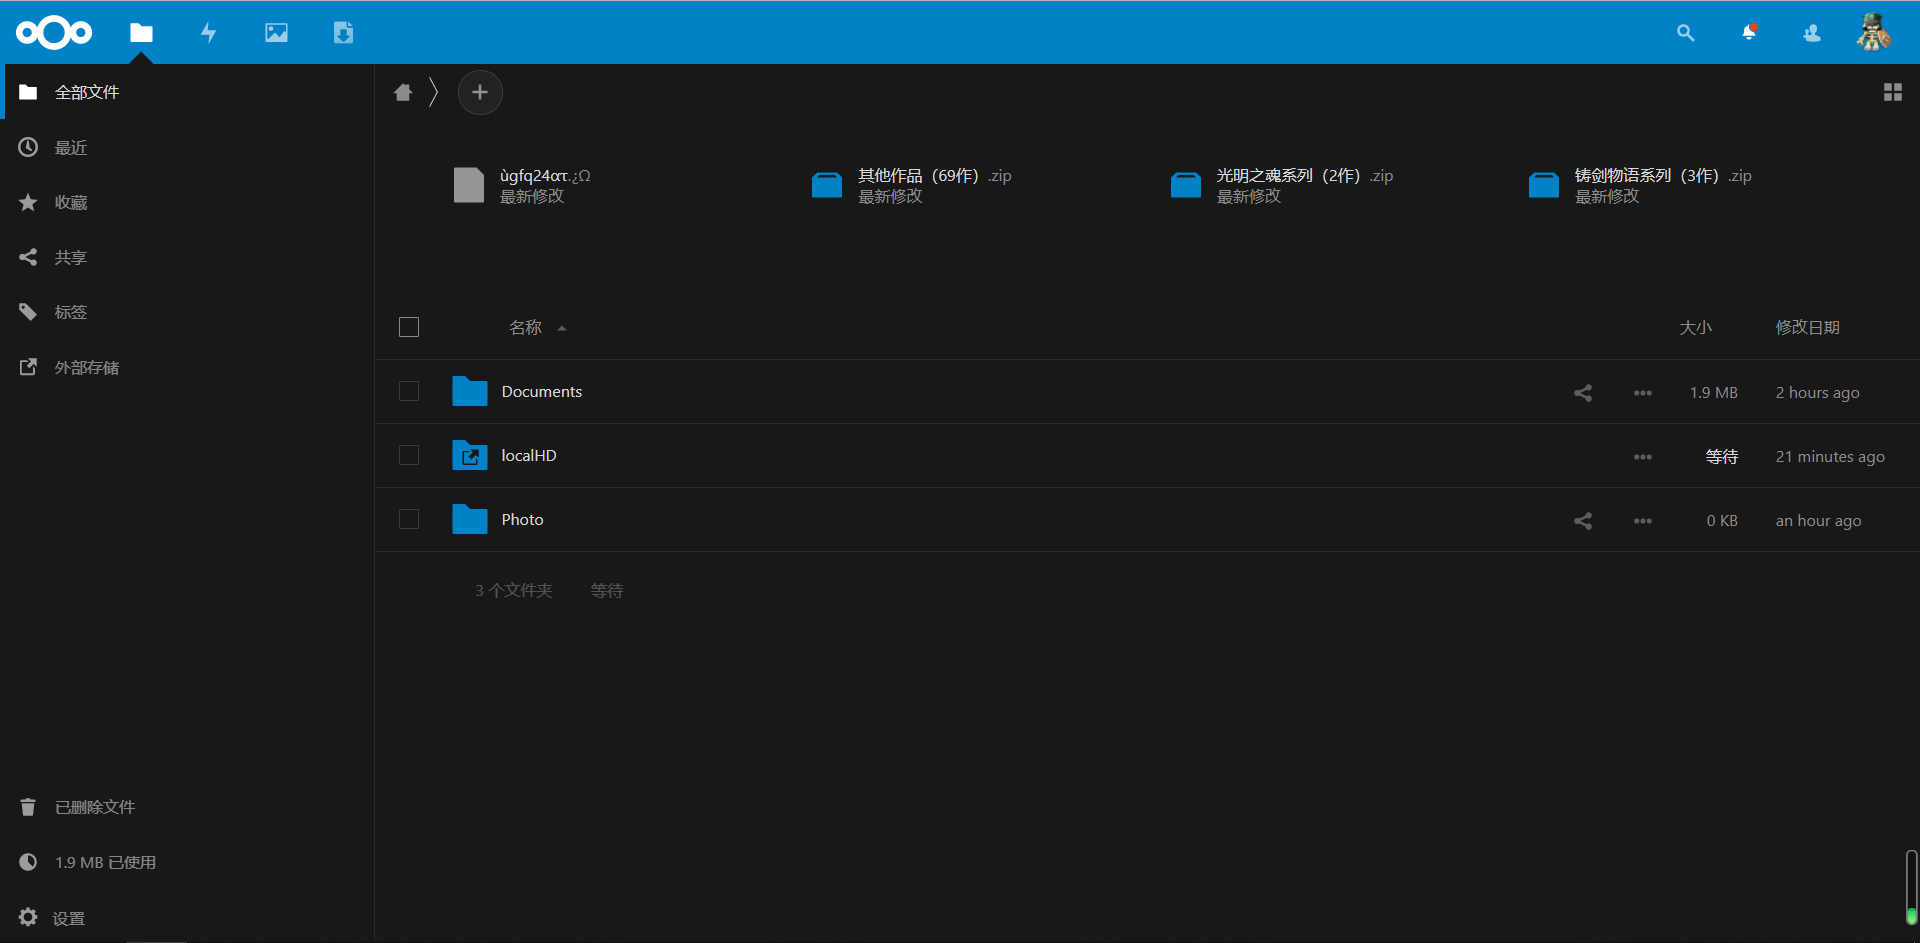
登录web,根据提示录入数据存储目录以及数据库信息等内容,nextcloud会自动初始化,登录后效果
配置连接本地移动硬盘
1. 安装依赖(新系统已经默认安装)
sudo apt-get install ntfs-3g
2. 挂载硬盘
插入硬盘,最新的系统默认会自动加载,但是我们需要指定一个固定的位置
# 创建挂载目录
$ sudo mkdir /mnt/localHD

# 查看移动硬盘所属盘符(一般是/dev/sda1)
$ sudo fdisk -l
Disk /dev/sda: 931.5 GiB, 1000170586112 bytes, 1953458176 sectors
Disk model: My Passport 0748
Units: sectors of 1 * 512 = 512 bytes
Sector size (logical/physical): 512 bytes / 512 bytes
I/O size (minimum/optimal): 512 bytes / 512 bytes
Disklabel type: dos
Disk identifier: 0x01de565c

Device     Boot Start        End    Sectors   Size Id Type
/dev/sda1  *     2048 1953458175 1953456128 931.5G  7 HPFS/NTFS/exFAT

# 添加系统自动挂载
$ sudo vim /etc/fstab
在最后一行添加
/dev/sda1 /mnt/localHD ntfs-3g defaults,noexec,umask=0000 0 0

# 重启生效
$ sudo reboot
3. 添加外部存储功能(默认不开启)
打开nextcloud页面,头像-->应用-->搜索External storage support,然后启用

4. 配置本地硬盘
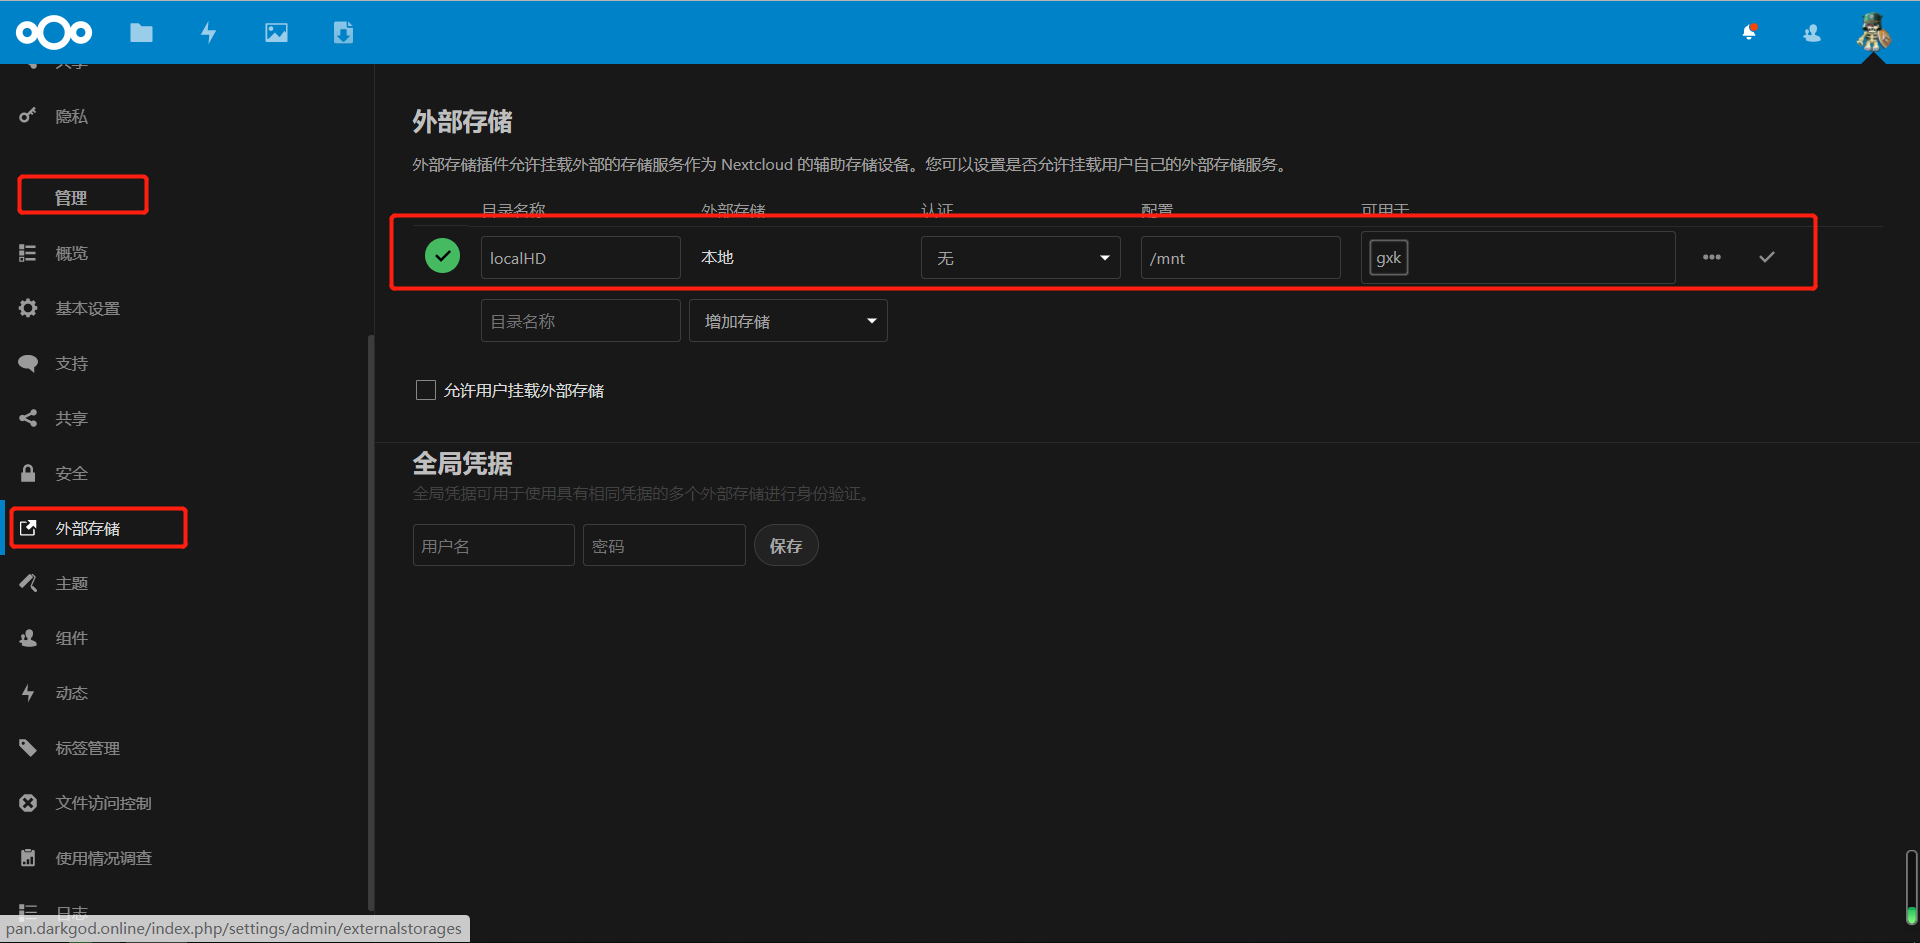
打开nextcloud页面,头像-->设置-->管理-->外部存储,按照如下设置添加本地硬盘,不能直接添加硬盘挂载的目录,我试了很多次都不行,只能挂载上一级目录
5. 测试一下吧
